This post may contain affiliate links to products on amazon.com. When you click one of these links and make a purchase, I will receive a small commission, at no cost to you, that enables me to continue providing free recipes. Thank you!
Showing posts with label Kids. Show all posts

Vegetable Soup in the Instant Pot


I recently did a month-long "pantry challenge" where I challenged myself to try to use as much as I could from the freezer and pantry, minimizing trips to the grocery store and then only for fresh produce as needed.

Following that rule, I made vegetable soup! It was so easy and we made grilled cheese sandwiches to go with it. By cooking in the Instant Pot, it tastes like it cooked all day but really it only took 45 minutes from start to finish.

If you don't already have an Instant Pot, you can use a regular slow cooker or just make it on the stove and let it simmer a while. But really, you should get an Instant Pot. ;)

Vegetable Soup in the Instant Pot

2 Tbsp Olive Oil
1 Onion, diced
2 cloves Garlic, minced
2 stalks Celery, diced
3 Carrots, sliced
2-3 cups of Vegetables (I used green beans and corn since I had them on hand, plus some shredded zucchini I found in the fridge. I add peas if I have them, and sometimes diced potatoes if I'm not worried about carbs)
2 cans Diced Tomatoes
2 cups Stock (I used chicken stock from the freezer, but would use water if I needed to make it vegetarian)
2 cans V-8 Juice
Herbs and Spices such as Oregano, Basil, Marjoram, Parsley, Thyme, Bay Leaf  (I added all of these, probably a tablespoon of the first 4 and a teaspoon of thyme, plus 1 bay leaf)
Salt & Pepper to taste

Push the Saute button on the Instant Pot, and saute the onion, garlic, celery and carrots in olive oil for a few minutes until the onions are tender.


Turn the IP off and add the rest of the ingredients. Give it a stir, place the lid, turn the valve to "sealed" and push the Soup button. Mine automatically set for 30 minutes and I thought that sounded good. Dinner is done!

Instant Pot Mashed Potatoes


Mashed potatoes - delicious and simple, but kind of a pain to make. How many times have I burned my fingers trying to remove hot potatoes from hot water? Then there's the variability of cooking time - you want them done but not TOO done, and then you don't want them to sit in that water and end up with pasty mashed potatoes. It can be a bit stressful.

No more of that! Using the Instant Pot makes it so easy. Cooking the potatoes in the instant pot with the milk makes it so simple, and there's nothing to drain! I hope to never boil potatoes for mashing again.

Instant Pot Mashed Potatoes

4lbs Potatoes, peeled and cut into quarters
1/2 cup Milk (I used Buttermilk)
1/2 tsp Salt (to taste)
1 tsp Pepper

Toss the peeled, quartered potatoes into the instant pot. Add milk, salt and pepper. Close the lid, turn the seal so it's closed, and push the Manual button and adjust the time down to 10 minutes. When it's done, release the pressure. Add butter to taste, and mash with a potato masher right in the pot. Done!

If you prefer to whip your potatoes, you can still keep this a one-pot dish and use your hand mixer right in the instant pot insert. :)

Chocolate Trifle

 
A potluck is the perfect excuse to make a rich dessert and know you won't end up eating the whole thing! I made this chocolate trifle for a party and it disappeared in no time. So delicious and fancy, and it took no time to make!

Chocolate Trifle

trifle bowl
You will need:

Brownies - you can make them from scratch, or use a boxed mix

1 quart of Heavy Whipping Cream (to make Whipped Cream and Chocolate Whipped Cream)

4 Tbsp Sugar, divided
2 tsp Vanilla, divided

Chocolate - either 2 Hershey bars, melted and cooled, or 4 Tbsp hot cocoa mix, or 3 Tbsp cocoa powder and more sugar. 

The big secret to this dessert is the bowl. I don't own a lot of fancy serving dishes, but a trifle bowl is worth keeping around, to me. It can make anything look special.

Directions:

Make brownies and let them cool. 

For whipped cream: Pour about half of the cream, with 2 Tbsp Sugar and 1 tsp Vanilla into your mixing bowl with whisk attachment, and whip just until it you have stiff peaks. You don't want to overbeat the cream, or you'll end up with butter! Remove the whipped cream to a container and set aside.

For chocolate whipped cream: Pour the rest of the cream, 2 Tbsp of Sugar (double this if you're going to use unsweetened cocoa powder) and 1 tsp Vanilla into the mixing bowl and whisk again to make whipped cream. Once it's whipped, fold in the chocolate of your choice and mix well.

Assemble the trifle in layers - there's no wrong way to do this, just remember to use the sides of the bowl to show off the different layers, and save enough whipped cream for the top layer. 

I start with brownies in the bottom, then alternate plain and chocolate whipped cream around the sides. Then more brownies, then more chocolate whipped cream, and finally plain whipped cream on top. Garnish with chocolate bits if you like. I just used a veggie peeler on a Hershey bar. 

If you need to cover the bowl for travel, you'll want to be sure not to fill it up all the way to the top so you can cover it with foil without messing up your garnish. Keep refrigerated until ready to serve. Enjoy!


Spinach Ricotta Bites


I found this recipe on Weelicious YEARS ago and I still make it regularly. It's one of my favorite breakfasts and snacks. My daughter will eat them too, which is a huge win. I get 24 minis but you can also make it in a regular muffin tin and have larger servings, just adjust cooking time accordingly.

Spinach Ricotta Bites

2 Tbsp Butter
1 Small Yellow Onion, chopped
1 Garlic Clove, minced
2 Large Eggs, Beaten
1 Cup Ricotta Cheese
1/2 Cup Mozzarella Cheese, shredded
1/2 Cup Parmesan Cheese, Grated
1 10 Oz Pkg Frozen Chopped Spinach, defrosted and drained, or you can cook fresh spinach in with the butter and onions and then drain it
1/4 Tsp Salt

1. Preheat oven to 350 degrees.
2. Melt the butter in a sauté pan over medium heat and cook the onions for 4 minutes until tender.
3. Add the garlic and cook an additional minute then set aside to cool.
4. Whisk eggs in a bowl and stir in ricotta, mozzarella and parmesan cheeses.
5. Once combined, stir in spinach, salt and cooled onion and garlic mixture.
6. Pour the mixture into lightly greased mini muffin cups.
7. Bake for 20-25 minutes or until the filling is set and golden on top.
8. Serve.

Brandy Butter Waffles with Cinnamon Sugar


Sometimes leftovers just beg to be reinvented. Such was the case with the brandy butter in the fridge. I imagined it would be delicious on waffles and no one was disappointed! A sprinkling of cinnamon sugar on top was the perfect touch. This is really a dessert but if you don't mind a sugary breakfast, go for it!

Brandy Butter Waffles with Cinnamon Sugar

3/4 cup Milk or Water
2 large Eggs
1 1/2 cups Pamela's Baking & Pancake Mix (I buy this in the bulk 25-lb bag)
2 tsp Cinnamon
1-2 tsp Chia Seeds, optional

Preheat waffle iron. Mix all ingredients well. Pour onto hot greased waffle iron and bake until done. Remove to serving plate, top with brandy butter sauce and a sprinkling of cinnamon sugar.

Lasagna Roll-ups


Lasagna is such a crowd pleaser. It's a lot easier to make a huge pan of lasagna with the Oven-Ready noodles, or fixing a Crock-Pot full of lasagna, so if you are feeding a big family, I recommend going one of those routes.

But if you want to have smaller portions available, for just 1 or 2 dinners or even lunches, these are fantastic. They are a little more work on the front end, but the convenience of the portions is worth it. Plus you are guaranteed to get the right proportion of noodles and cheese, which is really important to me. I don't like noodle hogs leaving me with too much ricotta. ;)

This is also a fantastic dish to make ahead and freeze. See directions below!  The pictures below show a double batch of roll-ups.

Lasagna Roll-ups

Ingredient List for a single batch:

1 box regular Lasagna Noodles
24 oz (1.5 lbs) Ricotta Cheese 
2 Eggs
3/4 cup Parmesan Cheese, grated
3/4 cup Mozarella Cheese, shredded
1 Tbsp Basil
1 Tbsp Parsley
1/2 tsp Salt
1/2 tsp Pepper

Marinara Sauce - you can use jars of sauce, or make it from scratch. Here is my "super easy" recipe that starts with a pizza sauce base. I have been adding lots of veggies to it lately though (diced onion, bell pepper, shredded carrots, shredded zucchini, etc.)

Step 1. Boil Lasagna Noodles according to package directions. I use my giant stock pot for this job, so the noodles have plenty of room to move around in the boiling water. If you are using a regular pot, you may need to cook the noodles in smaller batches. I was able to cook 20 noodles (the whole box) in my big 12 qt stock pot.

While the noodles are cooking, lay out aluminum foil and give it a quick spray with oil to keep the noodles from sticking to it. When the noodles are done, lay them out on the foil. Be careful, they will be hot!

Step 2: Combine all filling ingredients. I use my Kitchenaid Mixer for this. Spread filling over each noodle. 

Step 3: Line a baking sheet with parchment paper. Roll up the noodles and place them seam-side down on the tray. It's ok if they are close but you don't want them to be touching. Freeze.


Step 4: Once frozen, package the rollups into freezer bags. I just put them all in one gallon-size ziploc and pull out however many I want to cook at a time. Freeze.

To cook, just put them in your baking dish, top with marinara sauce, and bake at 350° until bubbly, about 30 minutes. Top with mozarella cheese and bake for an extra 5 minutes until melted. You can make 1 or 2 in a small dish, or cook a larger batch for the whole family.

Optional: Put in your family's serving size in a ziploc, add 2 cups of marinara sauce to each bag and freeze. For my family I would put in 6 rollups, since we make 2 for each adult and one for each child. When ready to cook, cut away the bag, put the contents into a baking dish, cover with foil and bake at 350° until bubbly. It will take close to an hour this way. Top with mozzarella and bake an extra 5 minutes, then serve.


Lemon Cupcakes

This year for her birthday party, Alexa wanted to have lemon cupcakes in addition to vanilla. She ended up not loving them, but I sure did and I think all of the other adults did too. My mom loved them so much she decided to make them for her birthday, too. :)


Lemon Cupcakes

1 cup white Sugar
1/2 cup Butter
2 Eggs
2 tsp Vanilla
1.5 cups Flour
1 3/4 tsp Baking Powder
Zest and Juice of 2 Lemons
1/2 cup Milk

Preheat oven to 350*. Line cupcake pan with paper liners.

In mixing bowl, cream sugar and butter. Add eggs one at a time, and then vanilla. 

Add flour and baking powder, mixing until combined. Add lemon zest and juice, then stir in the milk until it makes a smooth batter.

Spoon into muffin cups and then bake for about 20 minutes or until done. The tops will be golden brown and a toothpick inserted into the center of a cupcake should come out clean.

Let cupcakes cool.

We frosted them with vanilla whipped cream - Whip heavy whipping cream in mixer with whisk attachment, or in vitamix. Add sweetener (I sometimes use liquid stevia but this time I used powdered sugar) and a splash of vanilla.

To enhance the lemon flavor, add a tablespoon of lemon juice and the zest of another lemon to the whipped cream. You may need to add sweetener - just taste it and add some if needed.

Chicken Casserole


This is based on the classic recipe my mom always made for people when they were recovering from surgery or just had a new baby. It's my go-to comfort food, especially when the weather gets cold.

I have altered it to remove the cream of chicken soup, and instead use sour cream. I also use brown rice but white rice is in the original, and usually use chicken breasts instead of a whole chicken because I keep those on hand. This recipe is gluten-free as long as you leave off the breadcrumb topping.

Chicken Casserole

2-3 Chicken breasts, cooked and chopped*
2-3 boiled Eggs, chopped
1 small Onion, chopped
1 cup Chicken Broth (if you boil the chicken breasts, just cook the leftover water down and use this)
2/3 cup Sour Cream
3 cups Rice, cooked (any kind is fine, and mixing types is great too)
1/2 tbsp Salt
1/2 tsp Pepper
2/3 cup Mayo

Topping (optional)
4 tbsp Butter
1 cup Breadcrumbs 

Combine all ingredients in a large bowl, and pour into 13x9 pan. Bake at 400* for 35 minutes or until golden brown.

* The easiest way to cook chicken breasts is in an electric pressure cooker like an Instant Pot. I'll never boil chicken again! I put frozen chicken breasts in with about half a cup of water, pushed the "Poultry" button and in 15 minutes they were cooked perfectly.

Shredding hot cooked chicken is easier than chopping it, using an electric mixer. I describe how to do that here.


Hardboiled eggs get the Instant Pot treatment now, too! Set your eggs on the IP rack, add a cup of water. Seal and cook under pressure for 5 minutes, NPR 5 minutes, then release. Your eggs will be perfectly cooked and easy to peel.

Beef Stew (gluten free)


This is one of our favorite meals and everyone in the family loves it! It's easily adaptable for different diets. Feel free to drop or sub different veggies if you are trying to reduce carbs. Some recipes coat the beef in flour before browning, but I skip that part and don't miss it, so this recipe is even gluten-free.

I love to make this in my Instant Pot. It cooks so fast yet tastes like it simmered all day.

Beef Stew

1 lb Beef Stew Meat (any roast cut into chunks is fine)
2 Tbsp Oil of your choice (I use refined coconut oil or olive oil, veg or canola is fine if you use those)
1 Onion, diced
2-3 cloves Garlic, minced
2 cups Beef Broth (or water)
1-2 cans Diced Tomatoes
1 quart V8 Vegetable Juice
3 cups Veggies, fresh or frozen. Classic options would be Carrots, Celery, Potatoes, Green Beans, Peas, and Corn. Alternative options could be Zucchini, Sweet Potatoes, or Rutabagas.
1 Tbsp Oregano
1 Tbsp Marjoram
1 Bay Leaf
Salt and Pepper to taste

Instant Pot directions: 

Push the "Saute" button and brown all sides of the beef in the oil. Add the rest of the ingredients, stir, and close the pot. Make sure the valve is closed for pressure. Push the "Meat/Stew" button and let the Instant Pot do all the work for you!

For Stovetop Cooking:

Heat oil on medium and brown meat on all sides. Add onions and saute until they soften. Add beef broth, scraping the bottom of the pot to deglaze it, and let simmer while you prepare the veggies.

Add remaining ingredients and bring to a boil, then cover and reduce to a simmer. The meat will get more tender as it simmers so it's nice if you can let it cook for at least half an hour or longer. Taste it for any needed salt. Depending on your V8 and Beef Broth, you may need to add some. Enjoy!

This can be made in the crock pot, but I recommend not skipping the first section where you brown the beef and cook the onions with it. After that point, when you add the veggies and herbs, you can throw it all into the crock pot on low for several hours. It also freezes really well. Sometimes I will get a bulk amount of stew beef and make a large batch of Beef Stew to freeze.

Sugar-Free Marble Cheesecake


My dad made this cheesecake and it is fantastic! He said it's important to taste the batter before you pour it, to make sure it's sweet enough. This recipe shows exactly what he did so hopefully it will turn out as good for you as it did for him.

Sugar-Free Marble Cheesecake

Preheat oven to 350.

For crust:

1 cup Pecans, chopped
1/2 cup Walnuts, chopped
1/8 cup Erythritol
2 Tbsp Butter, melted

Process all ingredients in a food processor and mix until well blended. Press into the bottom of a springform pan. It will be very thin.

Bake at 350 degrees for 5 minutes. Cool.


For filling:

2   8oz pkgs Cream Cheese, at room temperature
1 cup Erythritol
1 tsp Salt
1 ½ tsp Vanilla
1 tsp Lemon Juice
16 oz  Sour Cream
3 Eggs, at room temperature

Beat all ingredients, except the eggs, with an electric mixer until creamy. Add eggs one at a time until blended.

Reserve one cup of batter for marbling. Pour the rest into the springform pan.

Add 1 tsp Cocoa Powder and about 1/4 cup Erythritol or Xylitol (to taste) to the reserved batter. Spoon chocolate batter onto plain batter and drag a knife through to make a marbled pattern.

Place a pan with a couple of cups of water in it on the lower rack, underneath the rack where you will place your cheesecake. Bake cheesecake at 350 for 1 hour, then turn off the oven and leave the cheesecake in for one more hour before removing it.

Let it cool, and then refrigerate at least two hours until completely chilled.

Berry Trifle


When I asked my kids what they wanted to make for dessert for the 4th of July, they said, "Something festive!" so this is what I came up with.

I intended to make homemade Angel Food Cake to go in the trifle, but all of the recipes I found called for 12-18 egg whites, and we recently used up most of our eggs in bulk cooking so we only had 7 available. I decided to go with my old standby white cake recipe that is easy and always delicious.

Berry Trifle

Trifles basically need 3 layers - cake, cream, and fruit. Often recipes will also call for pudding but I don't do instant pudding anymore, and I didn't feel like it was necessary to make pudding for this so I skipped it.

First, bake the cake. Here is my recipe for white cake:

White Cake

1 cup white Sugar

1/2 cup Butter
2 Eggs
2 tsp Vanilla
1.5 cups Flour
1 3/4 tsp Baking Powder
1/2 cup Milk

Preheat oven to 350*. Grease and flour a 13x9 pan. You can make this cake in 8" round pans as well but since I knew I was going to chunk it up, I just made a large, thin layer.


In mixing bowl, cream sugar and butter. Add eggs one at a time, and then vanilla. Add flour and baking powder, mixing until combined. Stir in the milk until it makes a smooth batter.

Pour batter into prepared pan and bake for 20 minutes. Cool.

Once the cake is cool, wash and slice the berries and whip the cream. Here is my method for making homemade whipped cream that is so quick and easy: Easiest Homemade Whipped Cream

Layer everything into a trifle bowl. I start with whipped cream, and then add fruit, making sure to press it up against the sides of the bowl so it's visible. Then cake, then whipped cream, fruit, cake and finally top with whipped cream. Then decorate the top however you like with extra fruit. 


Review: Zoku Quick Pop Maker

Verdict: We love it!

http://www.amazon.com/gp/product/B003U9ZCRO/ref=as_li_tl?ie=UTF8&camp=1789&creative=390957&creativeASIN=B003U9ZCRO&linkCode=as2&tag=mmunchies-20&linkId=4MDHUFBDUXMZPISHWe are huge fans of popsicles. They are often a daily treat in our house, especially in the summer. I love to make them for my kids, since I can sneak in hidden veggies, and of course I know there is no food coloring or artificial sweeteners in my homemade pops.

This summer I have slacked on my smoothie/pop making and bought popsicles from the grocery store that were just fruit and sugar, but decided to get back to the homemade kind when they ran out for the last time.

I decided to splurge on this new little toy to get everyone excited about homemade pops again (and ease the pain of Mom saying no more from the store!)

I washed it and stuck it in the freezer the day it came, so we could get started on our pops first thing in the morning. The kids weren't even out of their pajamas before we were starting our popsicle project.
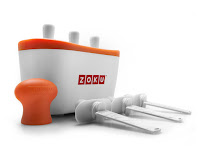
http://www.amazon.com/gp/product/B003U9ZCRO/ref=as_li_tl?ie=UTF8&camp=1789&creative=390957&creativeASIN=B003U9ZCRO&linkCode=as2&tag=mmunchies-20&linkId=4MDHUFBDUXMZPISHThe most important step is preparing all of the ingredients you want. Once you take the Zoku out of the freezer, the clock is ticking and you must get your ingredients in there quickly if you want any chance of making multiple batches before it's defrosted too much.

http://www.amazon.com/gp/product/B003U9ZCRO/ref=as_li_tl?ie=UTF8&camp=1789&creative=390957&creativeASIN=B003U9ZCRO&linkCode=as2&tag=mmunchies-20&linkId=4MDHUFBDUXMZPISHThe booklet says you can use the pop maker 3 times before refreezing, but I think the only way that would be possible is if you were just pouring a single juice in and letting it go. Adding fruit or making layers significantly increases the time it takes and you are lucky to get two batches done - no way three is happening for fancy pops.

For our first round, we decided to make three different pops, since we don't start out easy with anything around here. I would recommend starting out simple and then adding more complicated plans once you get the hang of it.

Here are all of our ingredients ready to go:

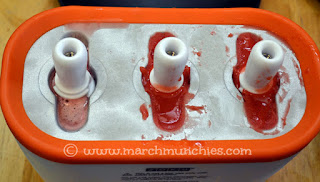
And our Zoku full and freezing:
http://www.amazon.com/gp/product/B003U9ZCRO/ref=as_li_tl?ie=UTF8&camp=1789&creative=390957&creativeASIN=B003U9ZCRO&linkCode=as2&tag=mmunchies-20&linkId=4MDHUFBDUXMZPISH

1. Watermelon Pops with Blueberries

I blended the watermelon and then strained it so it would be just liquid, no pulp. After the stick was seated in the Zoku, I dropped a few blueberries on either side and poured the watermelon juice in to the fill line. Super easy and it came out perfect! My kids devoured it in no time. We didn't feel it needed any sugar or anything as the watermelon was very sweet by itself.

2. Strawberry with sliced Strawberry and Banana

In the Vitamix, I blended frozen strawberries with honey and a little water. I recommend not using frozen strawberries, because I ended up having to blend for a long time to get it liquidy enough to pour easily. The Zoku requires very thin liquid so you can't make a thick smoothie and expect to be able to pour it around the stick and the fruit. So thaw your fruit first - it'll be easier to blend anyway.

Insert just a couple of pieces of thinly sliced fruit into the Zoku and insert the stick all the way so it's seated properly. We put a sliced strawberry on one side and a couple of slices of banana on the other side. Then pour the strawberry puree in to the fill line.

This one came out great as well! 

3. Strawberry Swirled with Yogurt

I used a homemade yogurt that is very thin, so it poured well. If your yogurt is thick, I recommend thinning it with some milk or cream so that it will pour easily. It should be sweet - I used honey to sweeten it since it was plain.

For this one, I poured some of the strawberry puree into the Zoku and waited about 2 minutes for it to harden up a little but not all the way. The I poured in some yogurt in and left it for about 3 minutes. Then I filled it the rest of the way with strawberry. I tipped the Zoku back and forth a little so the layers would swirl but not mix completely.

The yogurt took longer to freeze than the fruit only, but it was pretty easy to tell since the stick was wiggly long after we had removed the other two. Once the stick was firm in the pop the whole thing came out easily.

The possibilities are endless! What else should we try in our Zoku?

Smiley Face courtesy of Alexa :)

Chili


We make chili pretty often, even when it isn't cold out, but it's one of our favorites when the weather is chilly. So warm and satisfying and hit heats up well for lunch the next day.

I don't make it spicy at all, instead letting each person add spices and sauces to increase the heat level. This way it's always safe for my kids to eat (and me, since I am not a big fan of super spicy!)

Chili

1 lb Ground Beef
1 Onion, chopped
1 Bell Pepper, chopped
2-4 cloves Garlic, minced
4 cups V8
2 cups Beef Broth
2 cans Diced Tomatoes
2-3 cups Beans, cooked (or 2 cans, rinsed and drained)
2-4 Tbsp Chili Powder
1 Tbsp Cumin
2 tsp Basil
2 tsp Oregano
Salt and Pepper to taste

Brown ground beef with chopped onions and peppers. Add garlic toward the end of cooking. Drain fat if desired.  Add remaining ingredients and heat to boiling, then cover and reduce to simmer for 30 minutes. Serve. We love it with sour cream and shredded cheese.

You can also make this in the crock pot - begin the same, just put the meat mixture and remaining ingredients into the crock pot to heat through and cook for several hours. It'll be ready when you are. :)


Churro Waffles


I had this idea out of the blue - how amazing would it be to take a waffle and make it taste like a churro? A little cinnamon in the batter, and then a nice coating of cinnamon sugar on the outside. It sounded great. Oh boy. That was dangerous.

Churro Waffles

First make some waffles with your regular waffle recipe. For me that is a gluten-free version using Pamela's Baking Mix:

3/4 Milk (you can also use water if you prefer)
2 Eggs
1 Tbsp oil
1 tsp Vanilla
1 1/2 cups Pamela's Baking Mix
1/2 tsp Cinnamon

Mix well and make waffles on a waffle iron.

Meanwhile, Mix 2 Tbsp Sugar and 1 tsp Cinnamon on a plate. Melt butter in a skillet and when each waffle is done, dip it in the butter. Then dip it in the cinnamon sugar mixture. Serve.

Chocolate Chip Pumpkin Muffins


We added chocolate chips to the pumpkin muffins and they were so good! Love that combo.

Pumpkin Muffins

1/3 cup butter, melted
1 egg beaten  

1/2 cup Sugar or Honey, or just a few drops of Liquid Stevia
1.5 cup Whole Wheat Pastry Flour (or any combo of white/wheat)
 
3/4 cup Flax Meal  
1 tsp Baking Powder   
1 tsp Baking Soda
1/2 tsp Salt 

1/2 tsp - 1 tsp Pumpkin Pie Spice or Cinnamon
1 can Pumpkin
2 Apples, peeled and diced
Raw Pumpkin Seeds, if desired

1/2 cup or so of Chocolate Chips
Milk, optional


Preheat oven to 350*.  Prepare muffin tin with paper cups or spray with nonstick cooking spray.  Mix butter, egg and sweetener with electric mixer until combined.  Add pumpkin and apples, mix well. Add dry ingredients; blend well. Add chocolate chips and raw pumpkin seeds, if desired. Add milk a tablespoon at a time to moisten if needed.  Spoon into prepared muffin tin. Bake 20-25 minutes until they just start to brown and spring back when you touch them.


Pumpkin Muffins


This recipe is like my regular healthy muffin recipe, only subbing a can of pumpkin for the banana and adding a little pumpkin pie spice or cinnamon.

Pumpkin Muffins

1/3 cup butter, melted
1 egg beaten 
 
1/2 cup Sugar or Honey, or just a few drops of Liquid Stevia
1.5 cup Whole Wheat Pastry Flour (or any combo of white/wheat)
 
3/4 cup Flax Meal  
1 tsp Baking Powder   
1 tsp Baking Soda
1/2 tsp Salt 

1/2 tsp - 1 tsp Pumpkin Pie Spice or Cinnamon
1 can Pumpkin
2 Apples, peeled and diced
Raw Pumpkin Seeds, if desired
Milk, optional


Preheat oven to 350*.  Prepare muffin tin with paper cups or spray with nonstick cooking spray.  Mix butter, egg and sweetener with electric mixer until combined.  Add dry ingredients; blend well.  Add milk a tablespoon at a time to moisten if needed.  Spoon into prepared muffin tin. Sprinkle a few pumpkin seeds on the tops, if desired. Bake 20-25 minutes until they just start to brown and spring back when you touch them.

Gluten Free Chocolate Chip Cranberry Muffins


These muffins were really good, once we got over the drier, more crumbly texture from the GF flour. They actually tasted more like cookies, and they were DELICIOUS with butter spread on top. We joked that you should just frost them with butter. OK it wasn't a joke. Do it.
 
GF Chocolate Chip Cranberry Muffins

1/4 cup Butter, melted
1/2 cup Sugar or Honey, to taste
1 Egg
1 tsp Vanilla
1 cup Flour - I used King Arthur GF Blend
3/4 tsp Baking Powder
3/4 tsp Baking Soda 
1/2 tsp Salt
1/4 cup Chia Seeds
1/4 cup Milk or Buttermilk
1/3 cup Chocolate Chips
1/3 cup Dried Cranberries

Preheat oven to 325. Prepare a muffin tin with spray or paper liners.

Mix butter, sugar or honey, egg and vanilla with an electric mixer. In a separate bowl, combine flour, baking powder, baking soda, salt and chia seeds. Add flour mixture to butter mixture and mix just until combined. Add milk and mix until incorporated. Stir in chocolate chips and cranberries.

Drop batter into prepared muffin tin and bake until done - about 10 minutes for mini muffins but longer for regular size muffins. Cool and enjoy!

Bruschetta Chicken


This is one of my very favorite low-carb meals to make. It feels like an amazing Italian dish but without the bread or pasta. 

Bruschetta Chicken

2 lbs Tomatoes, diced (4-6 medium tomatoes)
2 Tbsp Olive Oil
2 Tbsp Balsamic Vinegar
2 cloves Garlic, minced
1 Tbsp Basil
2 lbs Chicken Breast, diced
salt and pepper
1 cup Mozzarella cheese, grated

Preheat oven to 350*. Mix olive oil, balsamic vinegar, garlic and basil. Add diced tomatoes and stir to coat. Set aside.


Cut up chicken breast and spread in the bottom of a deep baking dish. Sprinkle with salt and pepper and mix around. Pour tomato mixture over chicken. Cover and bake for about 40 minutes or until chicken in the center is done. Pour off some of the liquid if desired. Sprinkle with mozzarella cheese and bake additional 5 minutes to melt cheese.


Chocolate Cherry Chunk Brownies


I wanted to combine chocolate and cherries for a friend who loves both, and came up with this. Delicious!

Chocolate Cherry Chunk Brownies

1 stick Butter
1 cup Sugar
2/3 cup Cocoa Powder


  •  
  • large eggs, room temperature
  • 1/2 teaspoon vanilla extract
  • 1/2 cup all-purpose flour (or gluten-free all-purpose)
  • 3/4 cup dried tart cherries
  • Read more at http://www.farmgirlgourmet.com/2013/05/chocolate-cherry-brownies-giveaway.html#ZS2Pc4qVc3DHBvsB.99
    2 Eggs
    3/4 tsp Vanilla
    1/2 cup Flour
    1/4 tsp Baking Powder
    1/4 tsp Salt
    1/2 cup Chocolate Chips

    2/3 cup dried Cherries
    1/4 cup Chocolate Liqueur (optional) I used Chocolatier which is amazing

    Soak cherries in liqueur for a good half an hour before starting the rest of the brownies. If you don't I'm sure it'll be ok but I wanted mine to soak up as much as they could.

    Preheat oven to 350* and prepare an 8-inch square baking dish - either grease it or line with parchment.

    Combine butter, sugar and cocoa in saucepan on low heat to melt, stirring frequently. Remove from heat. Add eggs one at a time, and then vanilla, mixing well.

    In a separate bowl, combine flour, baking powder and salt. Add chocolate mixture and mix until just blended. Stir in cherries.

    Pour batter into prepared pan. Bake for15-20 minutes or until toothpick inserted in the center comes out clean. Cool, slice and serve.


  • 1/4 teaspoon kosher salt
  • 2 large eggs, room temperature
  • 1/2 teaspoon vanilla extract
  • 1/2 cup all-purpose flour (or gluten-free all-purpose)
  • 3/4 cup dried tart cherries
  • Read more at http://www.farmgirlgourmet.com/2013/05/chocolate-cherry-brownies-giveaway.html#ZS2Pc4qVc3DHBvsB.99


  • 1/4 teaspoon kosher salt
  • 2 large eggs, room temperature
  • 1/2 teaspoon vanilla extract
  • 1/2 cup all-purpose flour (or gluten-free all-purpose)
  • 3/4 cup dried tart cherries
  • Read more at http://www.farmgirlgourmet.com/2013/05/chocolate-cherry-brownies-giveaway.html#ZS2Pc4qVc3DHBvsB.99


  • 1/4 teaspoon kosher salt
  • 2 large eggs, room temperature
  • 1/2 teaspoon vanilla extract
  • 1/2 cup all-purpose flour (or gluten-free all-purpose)
  • 3/4 cup dried tart cherries
  • Read more at http://www.farmgirlgourmet.com/2013/05/chocolate-cherry-brownies-giveaway.html#ZS2Pc4qVc3DHBvsB.99


  • 1/4 teaspoon kosher salt
  • 2 large eggs, room temperature
  • 1/2 teaspoon vanilla extract
  • 1/2 cup all-purpose flour (or gluten-free all-purpose)
  • 3/4 cup dried tart cherries
  • Read more at http://www.farmgirlgourmet.com/2013/05/chocolate-cherry-brownies-giveaway.html#ZS2Pc4qVc3DHBvsB.99

    Grown Up Mac and Cheese with Chicken Parm Bites


    Sometimes you cook actual food and other times you eat boxed mac and cheese. And sometimes you combine them. :)

    We made some Chicken Parmesan Bites. Yum!

    Then we made some Grown Up Mac and Cheese. Yum!

    Put them together. You can thank me later. :)

    Of course, you can make homemade mac and cheese too. I do that sometimes, but probably not as often as let Annie's help me out.